0x00 See a program running

As an Electronics and Communications undergrad, I am deeply interested in the design of embedded systems in programmable logic, robotics and problem-solving. These domains excite me and drive my passion for learning and creating innovative solutions.
After setting up your work environment, the next step is testing to ensure everything is installed and wired up correctly. In this article, we load a series of example projects, compile and load them unto our MCU. For this purpose, we will be using the Keil MDK IDE. The procedures can be implemented in any development environment you are working with. Before moving to the coding part, we first examine how a high-level language like C is converted to an executable machine program.
The compilation process
The compilation process of a C source file involves several steps:
Preprocessing: The preprocessor reads the source file and processes any preprocessor directives (such as #include and #define) that appear in the file. This step generates a preprocessed version of the source file.
Compiling: The compiler reads the preprocessed file and converts it into machine code, a series of instructions that the computer's processor can execute. The compiler generates an object file for each source file in the Project.
Linking: The linker combines all the object files and any libraries required by the Project into a single executable file. It resolves external references (such as function calls to functions defined in other files) and generates the final executable file.
Loading: When the executable file is run, it is loaded into memory and executed by the processor.
This is a general overview of the compilation process. There may be additional steps depending on the specific tools and options used.
Running example projects: STM32 Firmware Package.
Keil MDK includes several example projects that demonstrate how to use various features of the development tools and how to program multiple microcontroller architectures. The STM32 Discovery firmware applications, demonstration and IP examples are provided in one package and supplied in one single .zip file.
A template project is a pre-configured project with an empty main function that you can customize.
The example project includes toolchain projects for each peripheral example.
The demonstration project includes demonstration firmware that you can run.
The example projects are organized by microprocessor architecture and include various projects such as DAC/ADC projects, USB projects, and networking projects. Each Project consists of a list of features demonstrated in the Project and instructions for building and running the Project.
Building, debugging and running 'blinky' example.
Open the pack installer and select your board under the "Boards" tab.
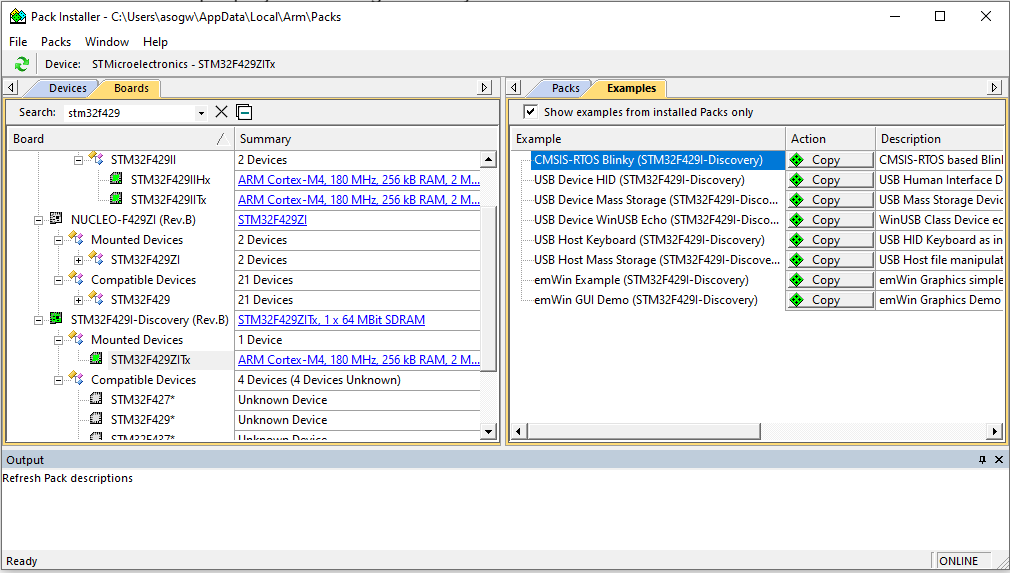
Under the "Examples" tab, copy the Blinky example and save it to your chosen directory. A new µvision project will be automatically created and opened.
Since this is a test to verify that our tool is installed and configured correctly, we will not try to understand this Project. You may open the project "Abstract" to understand what it does.
From the abstract, we see that it starts/stops blinking LED LD1 on the press of the user BUTTON.
Select Project> Rebuild All target files to compile your Project. If compilation is successful, the following window is displayed.

To program the Flash memory and start debugging, you can either select "Debug > Start/Stop Debug Session" or click the "Start/Stop Debug Session" button in the toolbar.
Select Debug > Run to run your application, or click the Run button in the toolbar.
Verify that all is good and the LEDs are blinking as expected.
Further reading
For more information on Keil µvison example projects, refer to the Keil MDK documentation.
Note: If you want to test out the firmware package provided by STM32, you may get an error about "ARM compiler 5" missing during compilation. To solve this, you must install the legacy ARM compiler and register it in Keil MDK.
Youtube demo


